
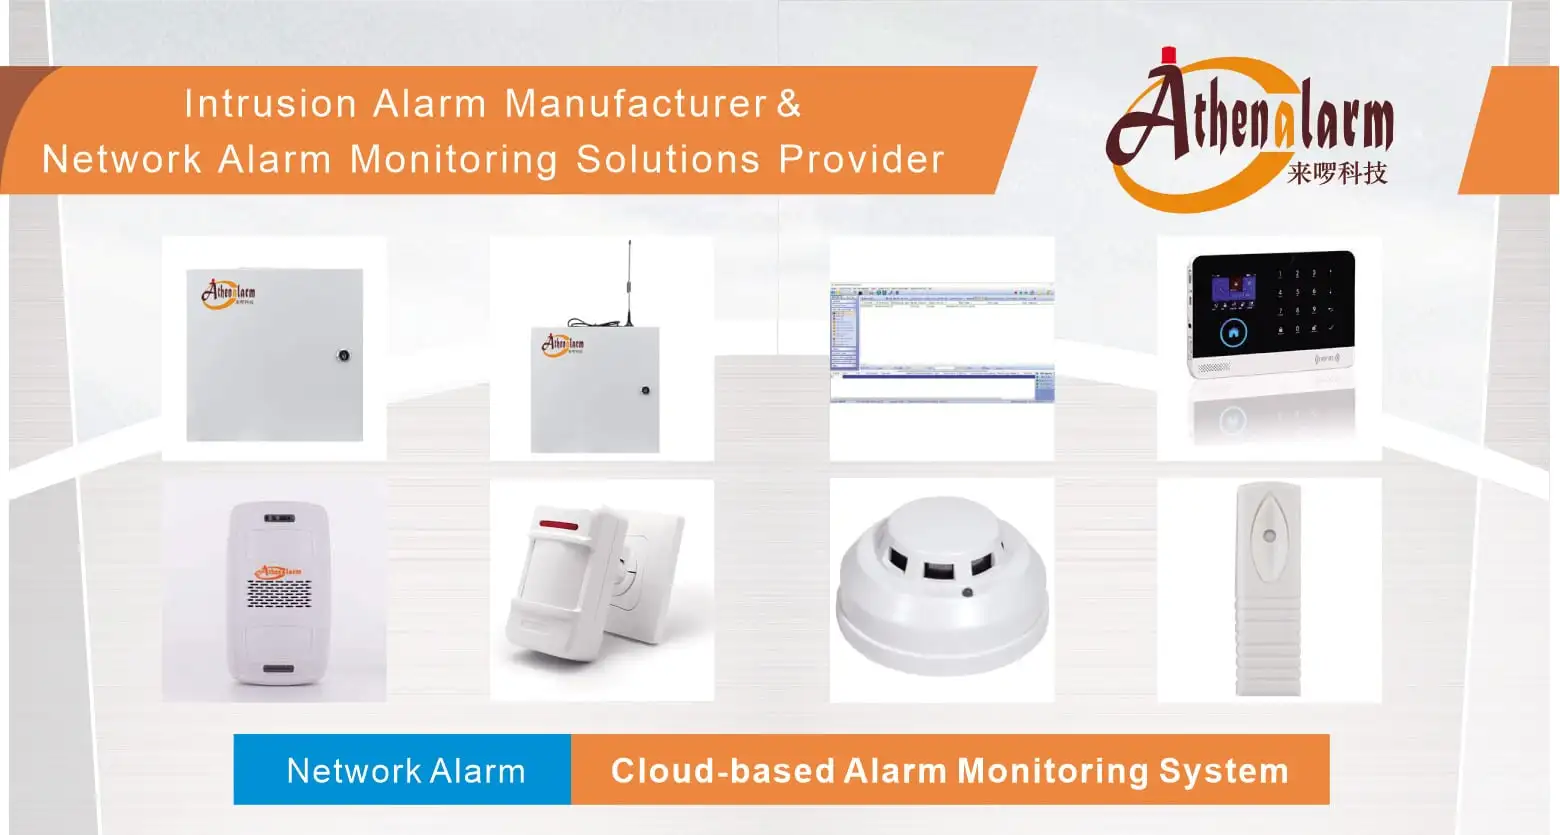
Burglar Alarm Control Panels Explained: Practical Setup, Integration, and Maintenance Strategies for Modern Security Systems
1. Why Burglar Alarm Control Panels Define System Performance
In today’s commercial security landscape, burglar alarm control panels serve as the central nervous system of any intrusion detection system. They receive input from dozens—sometimes hundreds—of sensors, process event logic in real time, trigger appropriate responses, and transmit alerts to monitoring centers and end users simultaneously. Every other component in the system ultimately answers to the panel. Get the panel right, and you have a robust, scalable security foundation. Get it wrong, and even the most expensive sensor array becomes operationally unreliable.
Burglar alarm control panels are purpose-built processing hubs that do far more than receive a signal and sound a siren. In professional commercial deployments, a control panel coordinates zone supervision, manages backup power transitions, drives relay outputs to third-party systems, maintains encrypted communication paths to alarm receiving centers (ARCs), and enforces role-based user access—often simultaneously, across hundreds of supervised circuits. For procurement leads, system integrators, and security consultants evaluating burglar alarm control panel solutions at scale, understanding what separates a correctly specified and commissioned panel from a poorly configured one is not an academic exercise. It is the difference between a system that performs under real-world conditions and one that generates false alarms, fails during power outages, or becomes a liability when audited.
This guide is written for security professionals who are well past the fundamentals: system integrators, technical project managers, procurement leads, and operations personnel responsible for deploying or overseeing commercial and industrial alarm installations. The goal is not to explain what a control panel is—you already know that. The goal is to help you configure, install, power, maintain, and integrate one at a level that produces genuinely defensible, long-term-reliable systems.
At the heart of this guide are 8 critical setup rules that define the difference between a system that performs under real-world conditions and one that generates false alarms, fails during power outages, or collapses when expanded. These eight rules cover:
- Zone architecture and allocation strategy
- Physical installation standards and positioning logic
- Structured maintenance protocols and scheduling
- Power supply design and backup management
- RS-485 bus deployment for large-scale installations
- Cross-system integration with surveillance, access control, and fire detection
- Remote access architecture and mobile management security
- Configuration error prevention and commissioning discipline
Let’s work through each one in depth.
2. Rule 1: Master Zone Architecture Before You Touch a Terminal
Zone design is the foundational decision in any alarm panel deployment. Every subsequent choice—wiring runs, sensor selection, response logic, user permissions—flows from how zones are structured. Most system failures that get attributed to hardware are, on closer inspection, zone design failures in disguise.
2.1 What a Zone Actually Represents
A zone is a logical grouping that maps one or more physical sensors to a single supervised circuit. The panel monitors the electrical state of that circuit—open, closed, or fault—and interprets changes based on the zone’s configured type and behavior rules. From the panel’s perspective, a zone is its primary unit of situational awareness.
Zone design is fundamentally an exercise in information architecture: what does the panel need to know, at what granularity, and in what sequence?
2.2 Zone Allocation Strategy
Begin with a detailed floor plan and identify every location that requires independent monitoring:
| Zone Category | Examples | Recommended Zone Type |
|---|---|---|
| Primary entry points | Main doors, loading bays, vehicle entrances | Entry delay |
| Secondary perimeter access | Fire exits, side doors, roof hatches | Instant trigger |
| Interior motion detection | Open-plan areas, corridors, server rooms | Motion (24hr or armed mode) |
| High-value asset areas | Safes, equipment cages, data centers | Isolated/instant |
| Tamper and environmental | Panel enclosure tamper, battery fault, mains failure | Supervisory |
As a practical rule, never assign more than four to six sensors per zone unless your installation documentation and client brief explicitly approve consolidation. Overloaded zones degrade diagnostic accuracy and complicate fault isolation during incidents.
2.3 Naming and Documentation Standards
Adopt a strict naming convention from day one. Use location-based descriptors with zone numbers: “Z03 – Server Room Door,” “Z11 – Rooftop Hatch,” “Z17 – Loading Bay PIR.” Avoid generic labels such as “Zone 4 – Motion” that become meaningless the moment a second technician works on the system.
Document every zone in three places: the panel’s configuration software, the physical wiring schedule, and the as-built drawing set. If these three records do not match, the system is not properly commissioned—regardless of whether it passes a functional test.
2.4 Scalability Planning
Select panels with a minimum of 20–30% spare zone capacity above your current installation requirement. Security environments evolve: tenants expand, floor plans change, compliance requirements shift. A panel already at 90% zone utilization on day one will require a costly replacement within two to three years. Build expansion headroom into your initial specification.
Also consider zone expansion modules. Many commercial panels support wired zone expanders over RS-485 that can double or triple native zone counts without replacing the main board. Specify these modules in your bill of materials even if they are not immediately populated—leaving slots empty costs nothing; retrofitting incompatible expanders later costs significantly.
2.5 Common Zone Design Errors
- Assigning entry delay to zones that should be instant (e.g., a roof access hatch never used as a normal entry point)
- Grouping perimeter sensors with interior sensors in the same zone, making it impossible to arm perimeter-only during occupied hours
- Failing to create a separate tamper zone, meaning enclosure interference is indistinguishable from a sensor fault
- Skipping functional walk tests after any re-zoning work
3. Rule 2: Installation Standards Are Not Suggestions
Panel placement decisions made during rough-in cannot be reversed cheaply. The physical installation environment directly affects signal integrity, system longevity, and operational security.
3.1 Location Selection Criteria
The panel enclosure should be positioned based on four criteria: signal balance, physical security, environmental conditions, and serviceability.
Signal balance means placing the panel as close to the geometric center of the cable runs as possible. Asymmetric layouts—where some zones require 800-meter runs while others need only 20 meters—create unequal circuit resistance values, which can trigger supervisory faults on sensitive panels. Plan cable routes before fixing the panel location, not after.
Physical security means the panel must be inaccessible to unauthorized personnel. A control panel in an unlocked utility closet or a visible reception area is a single-point vulnerability: anyone who reaches the panel can disable the system before the monitoring center receives an alert. Install in a locked, dedicated room, or in a steel enclosure with active tamper detection wired to a supervisory zone—never left disconnected.
Environmental conditions require panels to be kept away from:
- High-frequency emitters: variable speed drives, fluorescent ballasts, RF transmitters
- Metallic structures that attenuate wireless signals
- Temperature extremes: most commercial panels are rated for 0°C to 50°C; avoid plant rooms, uninsulated roof spaces, or locations adjacent to heat-generating equipment
- Moisture sources: condensation is a primary cause of terminal corrosion and PCB damage
Serviceability means the panel must be reachable by a technician with a laptop, test equipment, and a cable drum when needed. Install at a height and in a space that allows the enclosure door to open fully. Panels crammed into shallow utility ducts or behind fixed shelving generate unnecessary service labor costs throughout their lifecycle.
3.2 Wiring Discipline
Every terminal connection must be made correctly on the first attempt. Incorrect wiring—reversed polarity on sensor circuits, missing end-of-line resistors, ground loops between the panel and auxiliary power supplies—creates fault conditions that are time-consuming to diagnose and difficult to explain to clients.
Follow these wiring discipline rules without exception:
- Use wire ferrules on all stranded conductors before insertion into screw terminals
- Apply the correct end-of-line (EOL) resistor values per the panel manufacturer’s specification—typically 4.7 kΩ or 10 kΩ, and never mixed on the same panel
- Label every cable at both ends during installation, not after
- Photograph all terminal connections before closing the enclosure
- Verify loop resistance on every zone circuit before powering up
For wireless panels, mount antennas vertically, away from metallic surfaces, and at sufficient height to clear partition walls. Conduct a site radio frequency (RF) survey before finalizing antenna positions, particularly in reinforced concrete structures or buildings with metallic cladding.
3.3 Integration Into the Broader Security Architecture
Panel placement should be coordinated with the positions of the network switch, UPS, access control head-end, and NVR where these systems share the same equipment room. Co-locating infrastructure reduces cabling complexity and creates a single, auditable security core. Document the room as a “Security Head-End” in building management records and restrict access accordingly.
4. Rule 3: Maintenance Is a System, Not a Task
The operational lifespan of a burglar alarm control panel is typically 10 to 15 years. Systems that reach that lifespan without major incident do so because they are maintained systematically. Systems that fail prematurely—generating false alarms, dropping zones, losing communication—almost always share one characteristic: inadequate maintenance records.
4.1 Structured Maintenance Protocol
Implement a four-tier maintenance schedule with assigned responsibility at each level:
Monthly – Operational Verification (Performed by trained security or facilities personnel)
- Walk test all zones: physically activate each detector and confirm panel response and monitoring center acknowledgment
- Review event logs for anomalies: repeated fault clears, sensor offline events, or unusual arming/disarming patterns
- Confirm the backup communication path is active (if dual-path signaling is configured)
Bi-Monthly – Electrical Health Check (Performed by a qualified technician)
- Measure battery voltage under load (not open-circuit): replace if below 11.5V for a nominally 12V battery
- Inspect battery terminals for corrosion; clean with a terminal brush and apply anti-oxidant compound
- Check mains voltage at panel transformer output
- Verify surge suppressor integrity
Quarterly – System and Software Review (Performed by the installing integrator)
- Apply available firmware updates following the manufacturer’s release notes
- Review and tighten all terminal screw connections—vibration and thermal cycling loosen connections over time
- Test all relay outputs and verify connected device responses
- Clean the panel enclosure interior with compressed air; wipe the exterior with a dry microfiber cloth
Annual – Full Commissioning Review (Performed by the integrator with client sign-off)
- Repeat the full commissioning test per the original installation standard
- Update as-built documentation to reflect any changes made during the year
- Review zone configuration against current floor plan and occupancy
- Verify the monitoring center has current contact lists, response protocols, and access codes
4.2 Maintenance Records and Compliance
Every maintenance visit must produce a dated, signed service report. These records are not administrative formality—they are evidence of due diligence in the event of a security incident, insurance claim, or regulatory audit. Many commercial insurance policies require documented alarm system maintenance as a condition of coverage. Systems without service records may result in claim disputes.
Store service reports in both digital and physical form, with copies accessible to the client and the installing company.
5. Rule 4: Power Supply Design Is a Security Decision
A panel with no power is a panel with no protection. Power supply design is where many security professionals make cost-driven compromises that subsequently become liability-driven problems.
5.1 Understanding the Power Chain
Commercial burglar alarm control panels operate from a regulated DC supply, typically 12V or 24V, derived from mains AC through a dedicated transformer and rectifier. This primary supply powers the panel logic board, sensors on wired zones, and the siren output. The backup battery floats on this supply, absorbing charge when mains is present and assuming load when mains fails.
The transition from mains to battery must be seamless—no interruption, no reboot, no zone reset. Most well-designed commercial panels achieve this through a diode-based or relay-based switchover that operates in under 20 milliseconds. Verify this specification before selecting a panel for any installation where monitoring continuity is contractually required.
5.2 Battery Specification and Management
The standard backup battery for commercial installations is a 12V 7Ah or 12V 17Ah sealed lead-acid (SLA) battery. Lithium iron phosphate (LiFePO4) alternatives are increasingly available and offer meaningful advantages: longer cycle life (2,000+ cycles versus 300–500 for SLA), a stable voltage curve under load, and no risk of electrolyte leakage. The higher upfront cost is offset by reduced replacement frequency.
| Battery Type | Cycle Life | Voltage Stability | Risk of Leakage | Relative Cost |
|---|---|---|---|---|
| Sealed Lead-Acid (SLA) | 300–500 cycles | Moderate | Low | Lower |
| Lithium Iron Phosphate (LiFePO4) | 2,000+ cycles | High | Negligible | Higher |
Regardless of chemistry, apply these battery management rules:
- Never test battery voltage open-circuit. A degraded SLA battery can show 12.6V at rest but collapse to 10V under load. Always measure voltage with the mains disconnected and the panel fully operational.
- Replace proactively. SLA batteries in alarm systems should be replaced every two to three years on schedule, not reactively when they fail during an actual power outage.
- Size correctly. Calculate the panel’s maximum current draw (panel logic + all powered sensors + siren) and ensure the battery provides at least 24 hours of standby plus 30 minutes of full alarm at that draw. Many local codes mandate minimum standby times—verify applicable standards before specifying.
- Document installation date. Label each battery with its installation date. This single practice eliminates the guesswork that leads to preventable battery failures.
5.3 Surge and Fault Protection
Mains power in commercial environments is rarely clean. Voltage spikes from switching loads, lightning-induced transients, and utility switching events can damage panel electronics or corrupt configuration memory. Install a dedicated surge protection device (SPD) on the panel’s AC supply line, rated for the local mains voltage with a clamping voltage appropriate for the panel’s transformer input specification.
Additionally, protect the panel’s communications outputs—telephone line or network connection—with appropriate surge suppressors rated for the signal type. Lightning strikes on external cabling are a common cause of communication module failure.
6. Rule 5: RS-485 Bus Deployment for Large-Scale Installations
When an installation exceeds the native zone capacity of a single panel, or when devices must be distributed across a large physical footprint, RS-485 serial communication becomes the backbone of the system architecture. Understanding RS-485 correctly—not just knowing it exists—separates integrators who deliver reliable large-scale systems from those who generate chronic service calls.
6.1 Why RS-485 Works in Security Environments
RS-485 is a differential signaling standard: it transmits data as the voltage difference between two conductors (A and B lines) rather than as a voltage relative to ground. This differential architecture gives RS-485 its primary advantage in security applications—exceptional immunity to common-mode interference. Electrical noise that affects both conductors equally has no effect on the differential signal, making RS-485 reliable in environments with heavy electrical equipment, long cable runs through conduit shared with power cables, or significant EMI from industrial machinery.
Practical specifications for security applications:
| Parameter | Value |
|---|---|
| Devices per segment (standard load) | Up to 32 (more with repeaters or low-unit-load drivers) |
| Maximum reliable transmission distance | ~1,200 m (approx. 4,000 ft) at low baud rates |
| Typical baud rates in alarm systems | 9,600–115,200 bps |
| Topology | Multi-drop (daisy-chain) |
6.2 Correct RS-485 Topology
Use daisy-chain (linear bus) topology exclusively. Run the cable from the panel to the first device, then from the first device to the second, and so on to the last device on the segment. Never branch the cable or use a star topology—branches create signal reflections that cause data corruption at higher baud rates and under marginal cable conditions.
At both ends of the bus—the panel and the final device on the segment—install 120-ohm termination resistors across the A and B lines. These resistors absorb signal reflections by matching the characteristic impedance of the cable. Omitting termination on a long bus causes intermittent communication errors that are notoriously difficult to diagnose because they appear only under specific loading conditions.
Use screened twisted-pair cable (e.g., Belden 9842 or equivalent) for RS-485 runs. The twisted pair reduces differential interference pickup; the screen, grounded at one end only, reduces common-mode noise. Do not ground the screen at both ends—this creates a ground loop that can introduce the very interference you are trying to exclude.
6.3 Device Addressing
Every device on the RS-485 bus must have a unique address within the panel’s address space. Duplicate addresses cause data collisions—two devices responding simultaneously to a poll results in corrupted data that the panel interprets as a communication fault.
Before commissioning, create an address allocation table and verify that each physical device matches its assigned address in the panel configuration. Document the address of every device in your as-built records. When a device is replaced during a service call, the replacement must be assigned the same address as the failed unit, or the system configuration must be updated accordingly.
6.4 Troubleshooting RS-485 Problems
When RS-485 communication faults occur, follow a structured diagnostic sequence:
- Disconnect all devices from the bus and reconnect one at a time, testing communication after each addition. Isolate the device or cable segment causing the fault.
- Measure the voltage between A and B lines at rest: should read between 0.2V and 6V (bias voltage from the panel’s internal pull-up/pull-down resistors).
- Verify termination resistors are present at both ends and measure 60 ohms across A and B with the bus unpowered (two 120-ohm resistors in parallel).
- Inspect cable for damage, sharp bends, or incorrect connections (A-B reversal).
- Use an RS-485 protocol analyzer to capture bus traffic and identify which device is generating malformed frames.
7. Rule 6: System Integration Requires Deliberate Architecture
A burglar alarm control panel operating in isolation is a significantly diminished security tool. The full value of a modern panel is realized when it acts as an event-driven coordinator within a broader security ecosystem. Integration is not an optional enhancement—for commercial deployments, it is a baseline expectation.
7.1 Integration Pathways
Modern commercial panels offer multiple integration pathways, each suited to different use cases:
Relay outputs are the most universally compatible integration mechanism. A relay is a voltage-free contact that opens or closes in response to a panel event—alarm, zone fault, system arm/disarm. Connect relay outputs to door strike power supplies, siren circuits, lighting control systems, or any third-party device with a compatible input. Relays require no software compatibility—any device that accepts a contact input can be integrated.
Serial protocol integration via Modbus RTU or ASCII allows the panel to exchange structured data with building management systems (BMS), SCADA platforms, or energy management systems. This is the appropriate path when the downstream system needs more than a simple on/off trigger—for example, when a BMS needs to know which specific zone triggered an alarm in order to coordinate HVAC zone isolation or elevator control.
IP-based integration via RESTful APIs or proprietary software development kits (SDKs) provides the richest data exchange. Panel manufacturers who publish open APIs allow third-party platforms to read alarm state, zone status, user activity logs, and system health in real time. This is the foundation of unified security management platforms that present alarm, access control, and video data in a single operator interface.
Alarm monitoring center (AMC) connectivity via digital communicator (IP or cellular) is mandatory for any commercially monitored installation. Ensure the panel supports the monitoring center’s preferred protocol—SIA DC-09, Contact ID, or a proprietary variant—and that the communication path is tested with the center, not just with a local receiver.
7.2 A Practical Integration Scenario
Consider a commercial office building with the following coordinated response requirements upon confirmed intrusion detection:
- The panel activates the local siren and sends an alarm signal to the AMC via primary IP and backup cellular paths simultaneously.
- The AMC operator views the alarm event and references the integrated camera system, which has automatically repositioned the nearest PTZ camera to a preset covering the triggered zone.
- The access control system, receiving a relay output from the panel, locks all card-reader-controlled doors in the alarm zone, preventing lateral movement within the building.
- The building management system receives a Modbus command from the panel and restricts elevators to ground floor, limiting vertical movement.
- The security manager receives a push notification on their mobile device containing zone location, a camera snapshot, and current system status.
This coordinated response does not happen by accident. It is the result of deliberate integration architecture, tested during commissioning, and documented in the response protocol.
7.3 Integration Testing Protocol
Every integration point must be tested under actual alarm conditions, not simulated through software alone. Trigger real events, verify that each downstream system responds correctly, and document the response time. Integrations that work in isolation sometimes fail under real alarm conditions due to timing dependencies, network latency, or relay voltage mismatches.
8. Rule 7: Remote Access Architecture Must Be Secured Before It Is Convenient
Remote access to a burglar alarm control panel is one of the most operationally valuable features in modern systems—and one of the most commonly misconfigured. An unsecured remote access pathway does not merely create a cybersecurity vulnerability; it creates a vector through which an adversary can disable the physical security system protecting the building.
8.1 Communication Infrastructure
Remote access requires a reliable, always-on network connection. For commercial installations, provide a dedicated network connection for the panel—do not share the building’s general-purpose Wi-Fi or rely on a consumer router. The options in order of reliability preference:
Wired Ethernet is the most reliable and least interference-prone. Connect the panel’s network module to a managed switch on a dedicated security VLAN. VLAN segregation prevents the alarm system from being reachable from general office network segments and limits the impact of any broader network security incident.
4G/LTE cellular module serves as primary communication in locations without reliable fixed-line infrastructure, and as backup for all other installations. Specify an industrial-grade module, not a consumer hotspot device. Configure automatic failover from wired to cellular without requiring operator intervention.
Wi-Fi should be used only when neither Ethernet nor cellular is viable. Use WPA3 authentication, a dedicated SSID for security infrastructure, and position the panel within clear line-of-sight of the access point.
8.2 Authentication and Access Control
Apply the following security controls without exception:
- Change all default credentials on the panel, any associated cloud platform, and the network module before the system goes live. Default credentials for common alarm panels are publicly documented and actively exploited.
- Enable two-factor authentication (2FA) for all administrator accounts on cloud management platforms. A password alone is insufficient for an account that can disarm a building’s intrusion detection system.
- Implement role-based access control: define distinct roles for system administrators (full configuration access), security operators (arm/disarm, event review), and end users (arm/disarm only). Do not grant administrator privileges to users who do not require them.
- Configure session timeouts: remote management sessions should terminate automatically after a defined period of inactivity.
- Maintain audit logs: every remote access event—login, configuration change, arm/disarm command—must be logged with timestamp and user identity. These logs are essential for post-incident forensic review.
8.3 Notification Architecture
Effective remote management requires notification rules that deliver the right information to the right person at the right time—without generating alert fatigue.
Operational alerts (delivered to security personnel): zone alarm, zone tamper, communication fault, battery low, mains failure. These require acknowledgment and a timely response.
Administrative alerts (delivered to system managers): firmware update available, configuration change made, new user account created, multiple failed login attempts. These require review but not immediate response.
Test all notification delivery paths during commissioning and verify receipt on actual devices, not just in the platform’s test mode.
9. Rule 8: Configuration Error Prevention Requires Process, Not Just Skill
The majority of alarm system failures encountered in the field are not hardware failures. They are configuration errors—wrong zone types, incorrect delay timings, missing supervision settings, or inadequate user permission structures. These errors are preventable through process discipline, not through additional technical expertise alone.
9.1 High-Impact Configuration Errors
Zone type misassignment is the most consequential configuration error. A zone type determines how the panel behaves when that zone is violated: does it trigger an immediate alarm, allow entry delay, or activate only in a specific arming mode? Common misassignments include:
- Setting a rear entrance to “instant” when it should be “entry delay,” causing false alarms when staff use that entrance to disarm
- Setting a rooftop hatch to “entry delay” when it should be “instant,” creating a window during which an intruder can enter before the alarm activates
- Setting interior motion detectors to trigger in “stay arm” mode, preventing occupants from moving through the building without triggering the alarm
Delay timing errors create predictable windows of vulnerability. Entry delay must be long enough for legitimate users to reach the keypad but short enough to deny an intruder meaningful time inside. For most commercial applications, 30 to 45 seconds is the appropriate range. Entry delays exceeding 60 seconds are generally indefensible in a commercial security context. Exit delay should match the longest realistic time needed to leave the premises—typically 45 to 60 seconds.
Supervision interval configuration determines how frequently the panel polls wireless sensors or checks wired zone continuity. Extended supervision intervals reduce communication overhead but increase the time before a failed sensor is detected. For high-security applications, set supervision intervals to 60 minutes maximum. Some panels default to 24-hour supervision—meaning a failed sensor might go undetected for up to a day.
User permission errors include creating a single shared user code for all staff (eliminating individual accountability), failing to delete codes for departed employees, and granting arm/disarm capability to contractors or cleaners without time-restriction. Each user should have an individual code with a defined permission level and, where the panel supports it, time-of-day restrictions on when that code is valid.
9.2 Configuration Verification Process
Implement a structured commissioning checklist that must be completed and signed before any system is handed over to the client:
- Verify all zone types match the zone function and building access patterns
- Test entry and exit delay timings using a stopwatch under realistic conditions
- Trigger every zone individually and confirm correct panel response and AMC signal
- Test all relay outputs and verify downstream device responses
- Verify all user codes are assigned individually with correct permission levels
- Test remote access login with all configured user accounts
- Confirm all notification rules are active and deliver to correct recipients
- Test primary and backup communication paths to the AMC
- Test mains failure and battery switchover
- Document all configuration settings in the as-built record and obtain client sign-off
This checklist is not optional. Systems handed over without a completed commissioning record are a liability for both the installing company and the client.
9.3 Using Manufacturer Configuration Software
Always use the panel manufacturer’s official programming software for configuration. Third-party configuration tools or manual keypad programming—while sometimes faster—bypass built-in validation checks and increase the likelihood of invalid parameter entries. Manufacturer software typically includes configuration error detection, parameter range validation, and the ability to export a complete configuration file for backup.
Back up the panel configuration to a secure, off-site location after commissioning and after any subsequent configuration change. A configuration backup current to the last maintenance visit can restore a replaced panel to full operation in under an hour. Without a backup, rebuilding a complex configuration from scratch during a system failure represents a significant operational and commercial liability.
10. Conclusion: Eight Rules That Define Professional Practice
Burglar alarm control panels are sophisticated, mission-critical systems that demand the same engineering discipline applied to any other life-safety or high-reliability infrastructure. The eight rules covered in this guide are not theoretical principles—they are operational standards derived from real-world deployment experience across commercial and industrial environments.
Summary of the 8 Critical Setup Rules:
| Rule | Core Principle |
|---|---|
| 1. Zone Architecture | Design before you wire. Allocate zones to reflect information needs, not just physical coverage; build in 20–30% expansion headroom. |
| 2. Installation Standards | Panel placement is a security decision. Position for signal balance, physical security, environmental protection, and serviceability. |
| 3. Structured Maintenance | A four-tier schedule with assigned responsibilities and documented records is the difference between a 15-year system and one that fails in three. |
| 4. Power Supply Design | Size backup batteries correctly, replace proactively, measure under load, and protect the AC supply with appropriate surge suppression. |
| 5. RS-485 Bus Discipline | Use linear daisy-chain topology, install termination resistors at both ends, allocate unique addresses to every device, and document the address map. |
| 6. Deliberate Integration | Design and test every integration point—relay, serial, IP, and AMC—under real alarm conditions, not just in software isolation. |
| 7. Secured Remote Access | Enforce unique credentials, 2FA, role-based access, session timeouts, and audit logging before enabling any remote management capability. |
| 8. Configuration Discipline | Use manufacturer software, complete a structured commissioning checklist, back up configurations, and obtain signed client approval before handover. |
Security professionals who apply these eight rules consistently will deliver installations that perform reliably, scale predictably, and withstand the scrutiny of audits, insurance reviews, and post-incident investigations. Those who treat any of these rules as optional will find, eventually, that the shortcut taken becomes the cause of the failure they are called in to explain.
The burglar alarm control panel market continues to evolve rapidly, with increasing adoption of cloud-managed platforms, AI-assisted event verification, LTE-M and NB-IoT cellular communication, and edge processing capabilities that reduce dependence on central monitoring infrastructure. The fundamentals described in this guide apply regardless of how the technology evolves—because they are not about specific products. They are about engineering discipline, operational rigor, and professional accountability. Those qualities never become obsolete.
This guide is intended for qualified security system integrators, technical project managers, and procurement professionals. All installation and maintenance work should be performed by appropriately licensed and certified personnel in accordance with applicable local codes and standards.
11. Frequently Asked Questions
1. What is the primary function of a burglar alarm control panel in a commercial security system? A burglar alarm control panel is the processing hub of an intrusion detection system. It continuously supervises all connected sensor zones, interprets electrical state changes against configured zone logic, triggers local and remote alarm outputs, and maintains communication with an alarm monitoring center (AMC). It is the single point of coordination for every other component in the system, including sirens, keypads, detectors, access control interfaces, and remote management platforms.
2. How many zones should a commercial burglar alarm control panel have? For commercial installations, select a panel with at least 20–30% more zones than your current deployment requires. This spare capacity accommodates future expansion without panel replacement. For practical sizing: a medium-sized commercial premises with 20 active detection points should be installed on a panel rated for at least 26–28 zones. Always specify expansion module compatibility in your bill of materials, even if modules are not immediately populated.
3. What is the correct way to test backup batteries in a burglar alarm control panel? Battery voltage must always be measured under load, not open-circuit. Disconnect the mains supply and allow the panel to run fully from battery power, then measure terminal voltage. A 12V sealed lead-acid battery reading below 11.5V under load should be replaced immediately. Open-circuit voltage readings are misleading—a degraded battery can show 12.6V at rest while collapsing to below 10V under operational load.
4. How does RS-485 bus wiring affect burglar alarm system reliability? RS-485 uses differential signaling, which makes it highly resistant to electrical interference—a critical property in commercial environments with industrial machinery, variable speed drives, or long cable runs. Correct deployment requires strict daisy-chain (linear) topology with 120-ohm termination resistors at both bus ends, screened twisted-pair cable grounded at one end only, and unique device addresses for every node. Deviations from these standards—particularly branched topologies or missing termination—produce intermittent communication faults that are difficult to diagnose and damaging to system reliability.
5. What authentication controls are required for secure remote access to a burglar alarm control panel? At minimum: change all default credentials before the system goes live, enable two-factor authentication (2FA) for all administrator accounts, implement role-based access control with distinct roles for administrators, operators, and end users, configure automatic session timeouts for inactive remote sessions, and maintain a full audit log of every remote access event including login, configuration changes, and arm/disarm commands. Remote access that lacks these controls is an active security risk, not a management convenience.
6. How often should burglar alarm control panel firmware be updated? Firmware updates should be applied quarterly during the scheduled system review, following the manufacturer’s release notes to confirm compatibility and any configuration changes required. Critical security patches—those addressing communication vulnerabilities, authentication flaws, or remote access exploits—should be applied as soon as they are validated for the installed platform, regardless of the standard maintenance schedule. Always export and back up the current configuration before applying any firmware update.
7. What are the most common configuration errors in burglar alarm control panel commissioning? The three most impactful errors are: zone type misassignment (e.g., setting a rooftop hatch to entry delay rather than instant trigger), delay timing misconfiguration (entry delays exceeding 60 seconds in commercial applications are generally indefensible), and shared user codes (a single code for all staff eliminates audit trail capability and complicates post-incident review). All three are preventable through a structured commissioning checklist completed and signed before system handover.
8. When is IP-based integration preferable to relay output integration for burglar alarm control panels? Relay output integration is appropriate when the downstream system needs only a binary trigger—on or off. IP-based integration via RESTful API or SDK is preferable when the receiving system requires contextual data: which zone triggered, what time the event occurred, what the current system arm state is, or which user disarmed the system. Unified security management platforms, advanced BMS integrations, and video verification systems all require IP-based data exchange rather than simple relay contacts.
9. What cable specification is recommended for RS-485 connections in burglar alarm panel installations? Use screened twisted-pair cable rated for the application—Belden 9842 or a direct equivalent is a widely recognized standard for RS-485 in security and building automation. The cable must be a true twisted pair (not a flat parallel pair), as the twist is what provides differential noise rejection. The screen should be grounded at the panel end only to prevent ground loops. Do not use unshielded or non-twisted cable for RS-485 runs, particularly in environments with significant electrical interference.
10. What documentation is required at the handover of a commercial burglar alarm control panel installation? A complete handover package should include: the signed commissioning checklist verifying all zones, delay timings, relay outputs, user codes, and communication paths have been tested; the as-built wiring schedule and floor plan showing all zone locations; the panel configuration export file stored in a secure off-site location; the RS-485 device address allocation table; battery installation date records; and the monitoring center’s confirmed response protocol, contact list, and access codes. These documents serve as evidence of professional due diligence in the event of an insurance claim, security incident, or regulatory audit.
